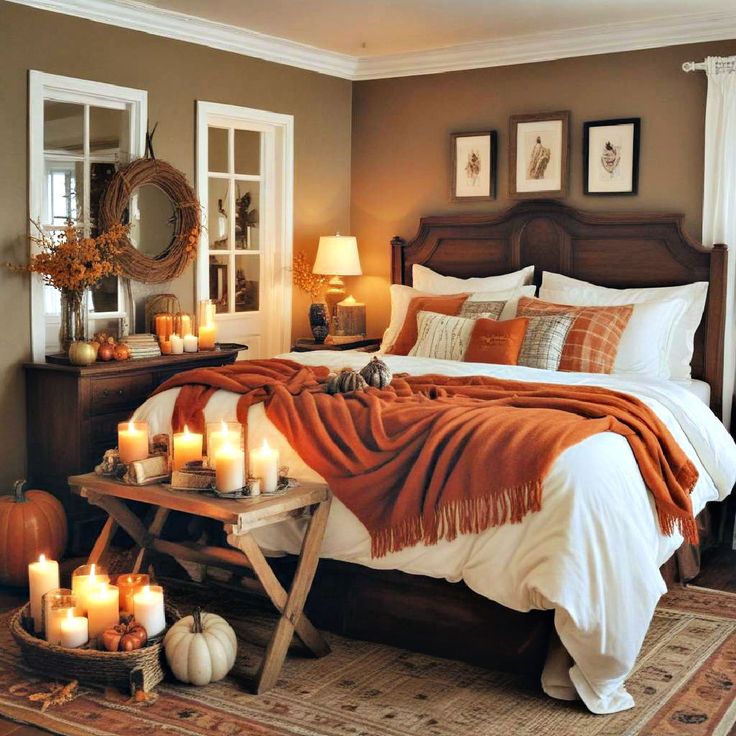

12 Pumpkin Carving Ideas for Beginners & Experts
You want a pumpkin that looks cool not an orange ball with two crooked eyes right? I have carved Halloween pumpkins and I have to admit I’ve made some that look bad and some that look good all in the same night. The good news is you can make a pumpkin with the right ideas even if you don’t like using stencils.
So grab a pumpkin be patient and maybe have a snack that you won’t accidentally throw away. Ready to make your porch look like its really Halloween?
Before You Carve: A Quick Setup That Saves Your Time
You don’t need a lot of tools. You do need a plan. I always pick a pumpkin with a bottom and a smooth face because I like my designs to look good.
Here’s what I use to carve:
- A strong knife with a serrated edge (small pumpkin saws work. I like to have control)
- A scoop (. A big spoon that you don’t mind getting dirty)
- A marker to draw
- Toothpicks to fix mistakes
- LED candles (they’re safer and they don’t heat up your pumpkin)
When you cut from the bottom of the top your pumpkin stays firm longer and you won’t knock the lid off every time you move it.
1. Classic Jack-o’-Lantern (Easy)
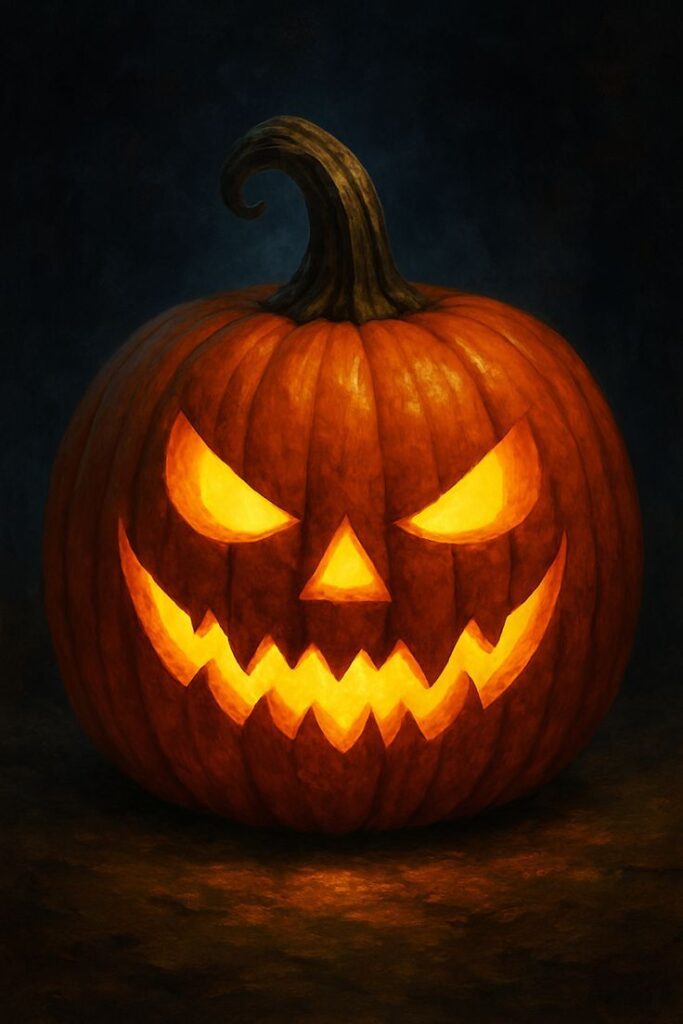
You can’t go wrong with a pumpkin because it always looks like Halloween. I like a smile and triangle eyes because I can draw it freehand even when I’m in a hurry.
Try this if you want:
- Fast results
- A lot of glow
- A design you can change while you’re carving without stress
Have you noticed how a little bit of imperfection in the smile makes it look creepier? Good, for you.
2. Cute Cat Face (Easy)
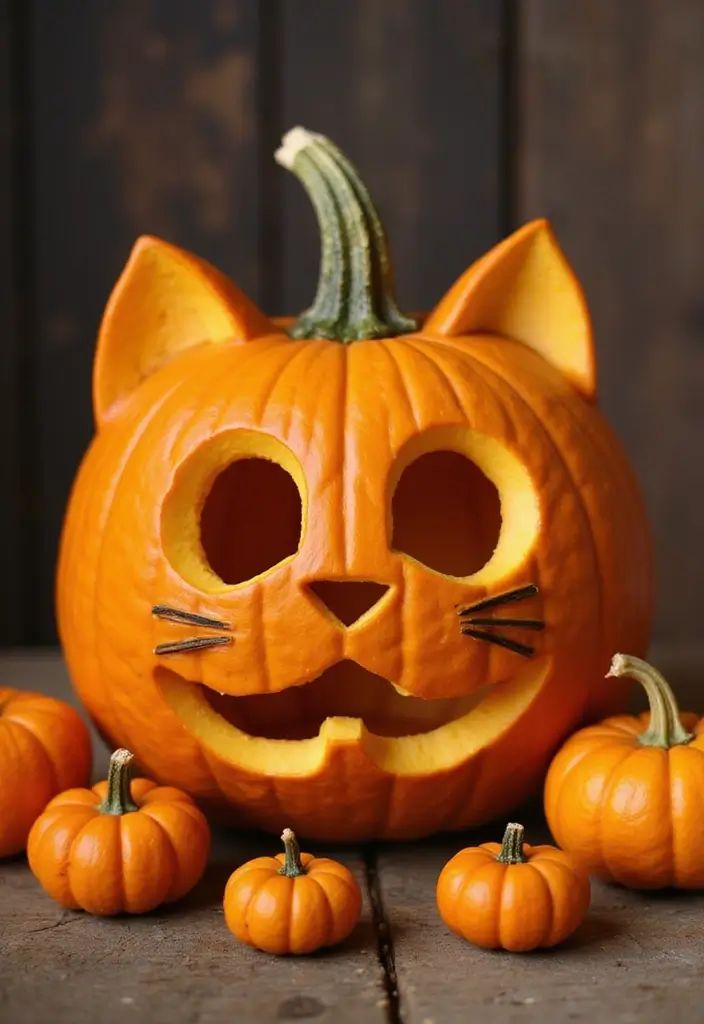
A cat pumpkin looks cute. Still looks spooky if you give it big eyebrows. I carve eyes, a little nose and whiskers then I make pointy ears by shaping the top edge.
Quick tip: use toothpicks to attach ear triangles if you mess up. I started using that technique after an ear broke off… It was an accident.
3. Ghost Silhouette (Beginner)
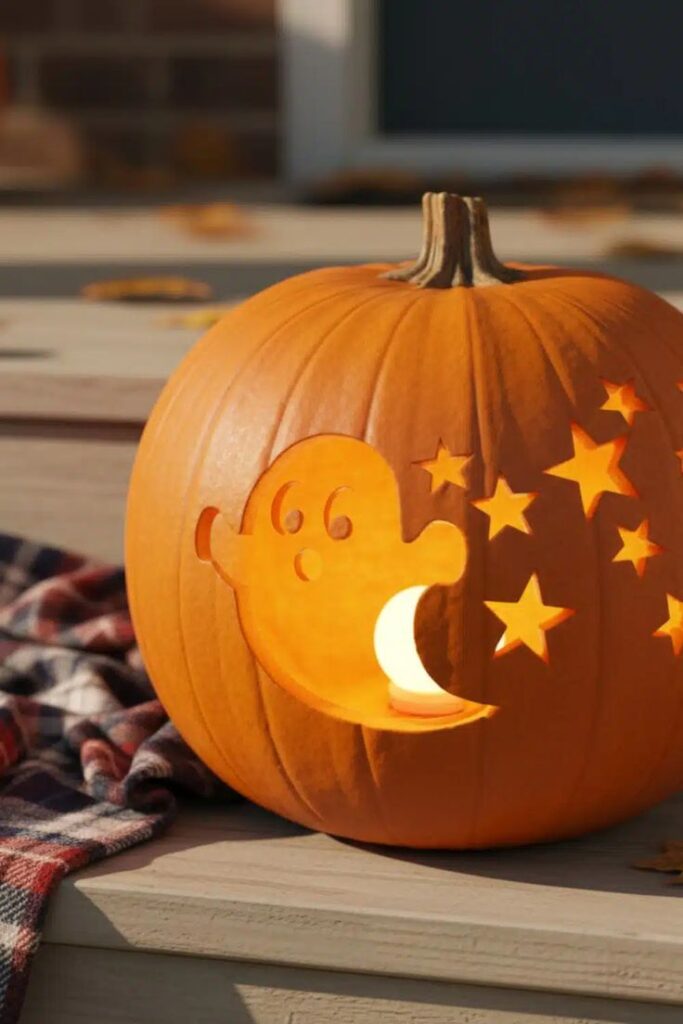
This idea is really easy. It is kind of like cheating but in a good way. You make a ghost shape and leave the rest of the pumpkin clean so the glow from the pumpkin does all the work.
I think you should try these things:
- A rounded head on the ghost
- Wavy edges on the bottom
- Big oval eyes to make the ghost look cute
- If you want the ghost to be even cuter you can tilt the eyes. If you want the ghost to be spooky you can make the eyes smaller. Add a tiny mouth.
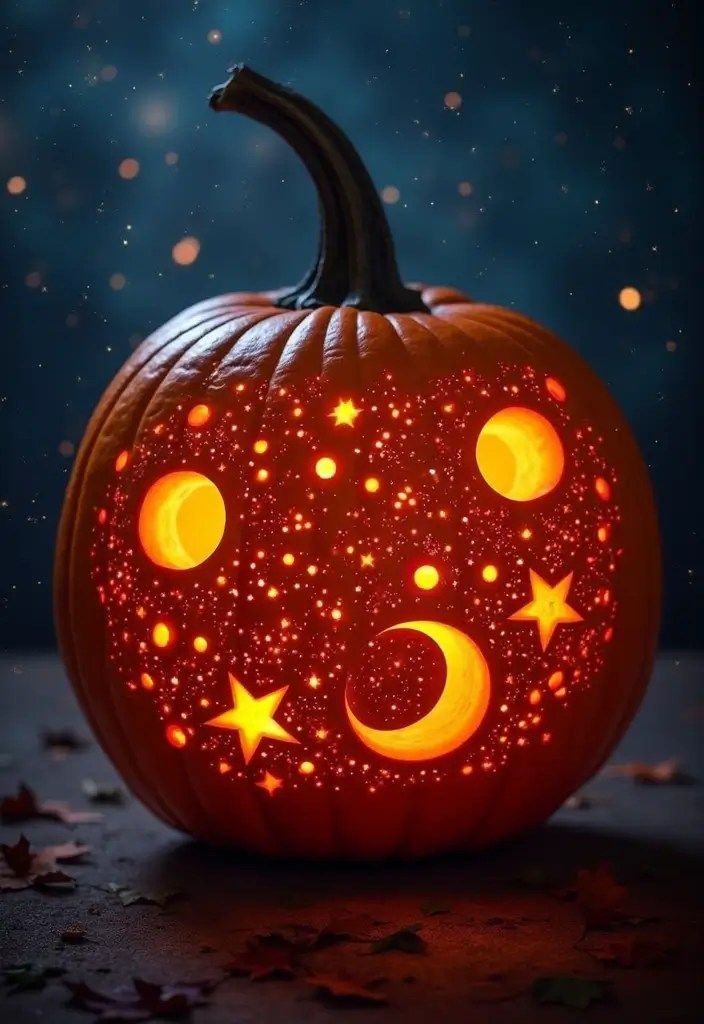
4. Polka Dot “Starry Night” Pumpkin (Beginner)
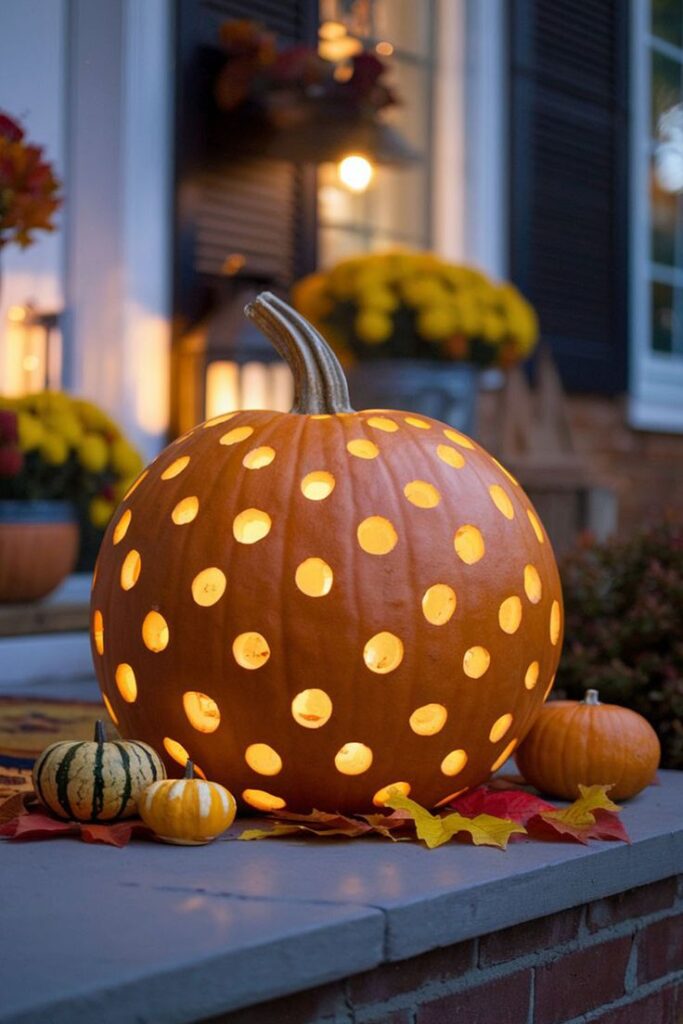
You do not even have to carve a face on this pumpkin. You just make a lot of holes over the pumpkin using a drill or a big skewer and the pumpkin will look like a lantern that glows.
I really like this idea because:
- It looks fancy. It is not hard to do
- It hides any mistakes you make
- It works well even if the pumpkin is a shape
- A lot of holes can actually look really nice. It is an idea for Halloween.
5. Bat Swarm (Easy-Intermediate)
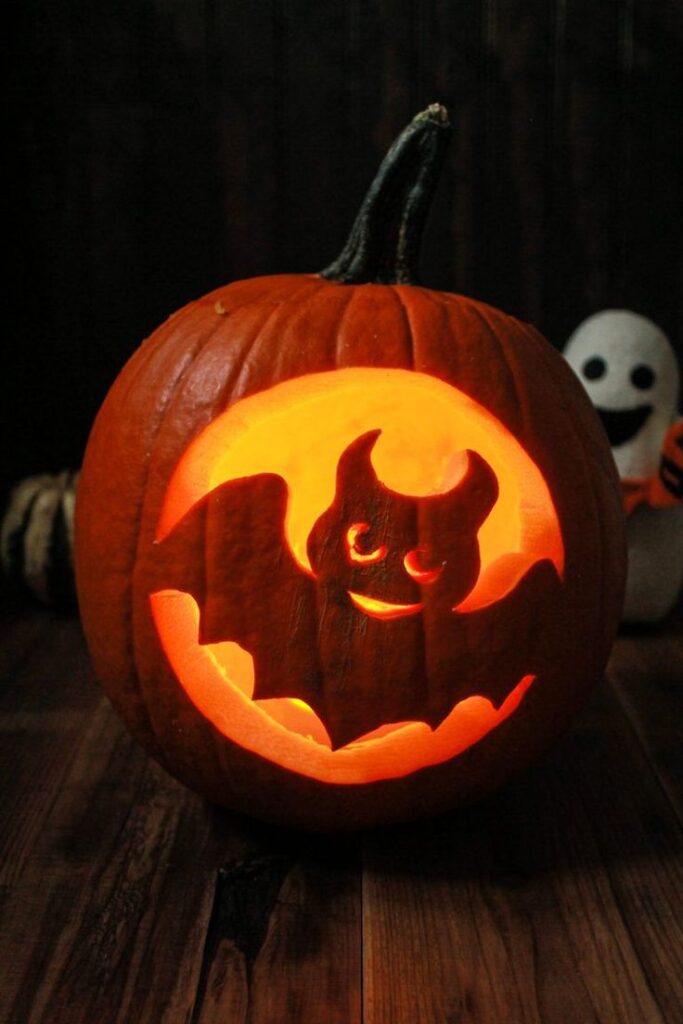
You carve a bat on the pumpkin and then add some smaller bats that look like they are flying away. You can draw the bats quickly using curves and you can make them different sizes to make the design look interesting.
To make it look even better I do these things:
- I carve out a few of the bats completely
- I make cuts for the bats in the background but I do not cut all the way through the pumpkin
- The contrast between the cut out bats and the background bats makes the design look really good.
6. Spider + Web Corner (Easy-Intermediate)

You carve a web in one corner of the pumpkin and a big spider hanging down. People always like this design. I think it is because they like spiders and it is fun to be a little scared.
Here is how you can do it:
- First you carve the straight lines of the web
- Then you add some lines between the straight lines
- Finally you carve the spider itself
- If you want it to look more dramatic you can make the spider legs thicker than you think they need to be. The Ghost Silhouette and the Polka Dot “Starry Night” Pumpkin and the Bat Swarm and the Spider + Web Corner are all ideas, for Halloween pumpkins.
7. Witch Hat Profile (Intermediate)
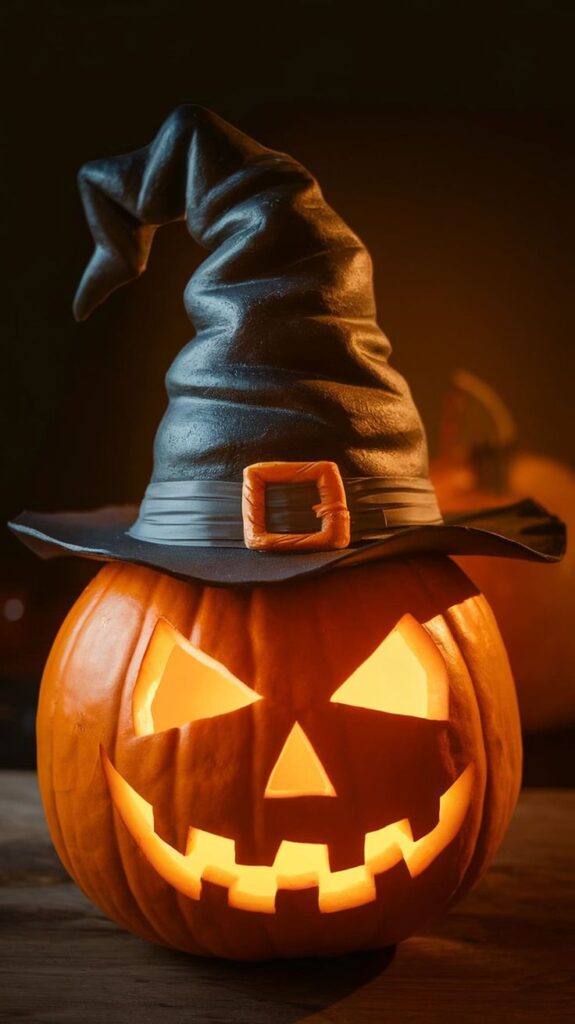
A witch profile looks really cool. You do not need to be a great artist. You just draw a nose, chin and hat edge then you cut out the shape clearly.
I like this design because you can:
- Keep it basic and easy to recognize
- Add a star or moon next to it
- Fix lines by making them smooth not redoing the face
I think the hat makes the whole thing look good so make it big and stand out.
8. Haunted House Windows (Intermediate)
You cut out a house shape. Make windows so the pumpkin glows like a small haunted house. I add windows and a slanted roof because a perfect house does not look scary.
Try these details:
- A tall door with a top
- Windows of different shapes
- A few “cracked” lines in the walls
I have never seen a perfect haunted house and thought it was scary. I do not think anyone else has either.
9. Day-of-the-Dead Sugar Skull (Intermediate-Advanced)
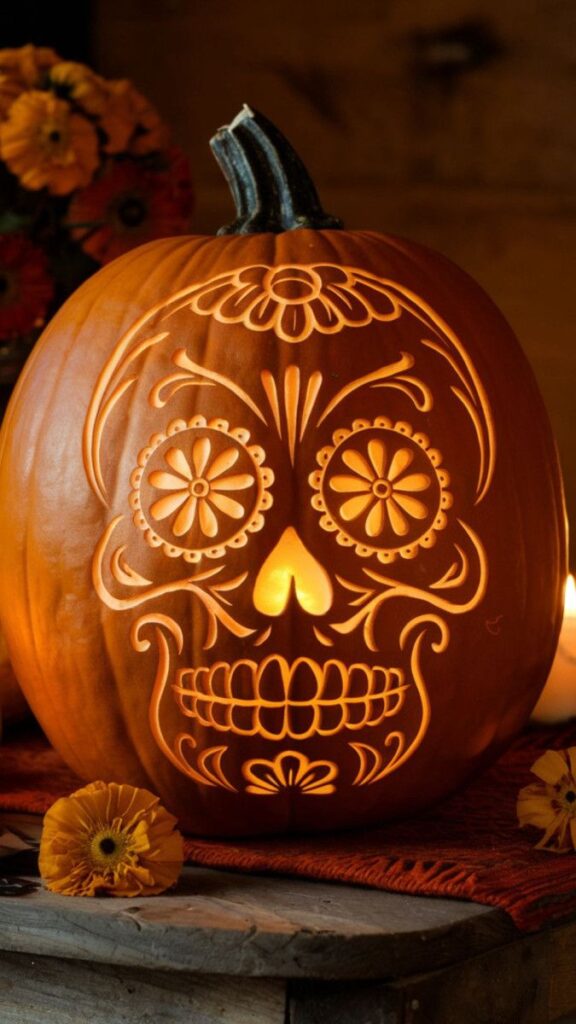
This design looks complicated. You can make it simpler with repeating shapes. I carve eyes then I add petal shapes, dots and swirls around them.
To keep it clear focus on:
- Making it symmetrical (use a marker to check lightly)
- shapes first small details last
- A strong outer skull shape
This one takes time. It makes your pumpkin carving ideas list look much better.
10. Negative Space. Word (Advanced)
You cut out the background. Leave letters as they are so the word stands out clearly. This technique looks good. It needs patience and careful spacing.
I suggest:
- Printing a font that you can read from away
- Keeping letters thick and blocky
- Leaving pumpkin around thin parts, like “E” and “A”
Want to impress your neighbors? Carve your family name. Watch them learn how to spell it.
11. 3D “Peel Back” Monster
This pumpkin design is really cool. It looks like a monster is coming out of the pumpkin. You make the edges all jagged and rough like they are torn. Then you carve the pumpkin so it looks like it has layers.
Here is what I do to make it:
- Mark a tear shape on the pumpkin
- Carve deep around the edges so it makes a shadow
- Add some teeth or claws or an eyeball inside the pumpkin
Yes it is going to be a mess.. You will love it anyway.
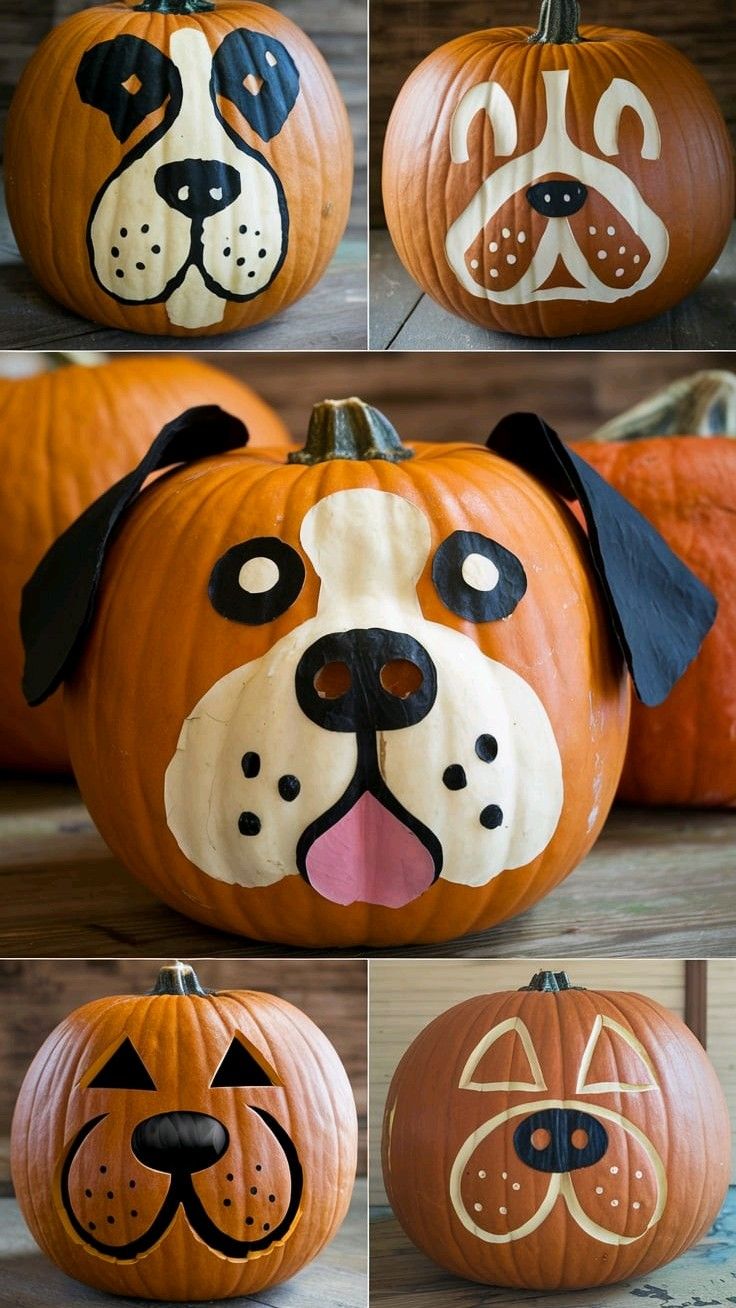
12. Portrait or Pet Face
You can make a portrait on the pumpkin without cutting out all the pieces. You just scrape the skin of the pumpkin to depths. Then when you put a light inside it makes highlights and shadows.
For your try pick a picture that is easy to carve.
- A picture with a lot of contrast
- A simple face that is not turned to the side
- A face with features, like glasses
You will need to be patient. Your first try might not look very good.. When you get it right people will be really impressed.
Quick Troubleshooting: Keep Your Pumpkin Looking Good
You can make a cool pumpkin design but if you do not take care of it it will start to shrivel up. I do a things to keep my pumpkin looking good.
- I keep my pumpkin in a place out of the sun
- I use LED lights of candles
- I mist the cut edges with water. Store the pumpkin in a cool place at night
If you want to make your pumpkin look even better you can add a piece of paper inside to make the light softer.
Final Thoughts: Just Pick One Idea and Carve the Pumpkin
You do not need to be perfect, at carving pumpkins. You do not need a lot of tools. You just need one of these pumpkin carving ideas a pumpkin and the courage to start cutting. Just pick one idea. Go for it. You can do it.