How to Build a Mud Kitchen in 3 Easy Steps
You want a mud kitchen. You don’t want to spend three weeks building it and end up frustrated right? I feel you. I made my DIY mud kitchen after seeing kids play “cooking” with a bucket and a stick. They were making soup, with mud. Serving it with a stick.
I figured I might as well give them a proper setup (and save my patio from becoming a You want a mud kitchen. You don’t want to spend three weeks building it and end up frustrated right? I feel you. I made my DIY mud kitchen after seeing kids play “cooking” with a bucket and a stick. They were making soup, with mud. Serving it with a stick. museum).
Ever wondered why kids ignore the fancy toy kitchen indoors and sprint toward dirt outside like it offers free Wi‑Fi? Let’s build an outdoor mud kitchen for kids that actually gets used—without making you regret your life choices.
Step 1: Pick the Spot + Gather Your Mud Kitchen Materials

Choose the right location (aka: don’t sabotage yourself)
Put your mud kitchen where you can supervise without hovering like a security camera. I like a spot near a hose or rain barrel because kids treat water like a magical ingredient that improves everything. Do you want to carry buckets across the yard 47 times a day? Me neither.
Aim for:
- Shade or partial shade so kids don’t “cook” in full sun
- Drainage so your yard doesn’t turn into a swampy side quest
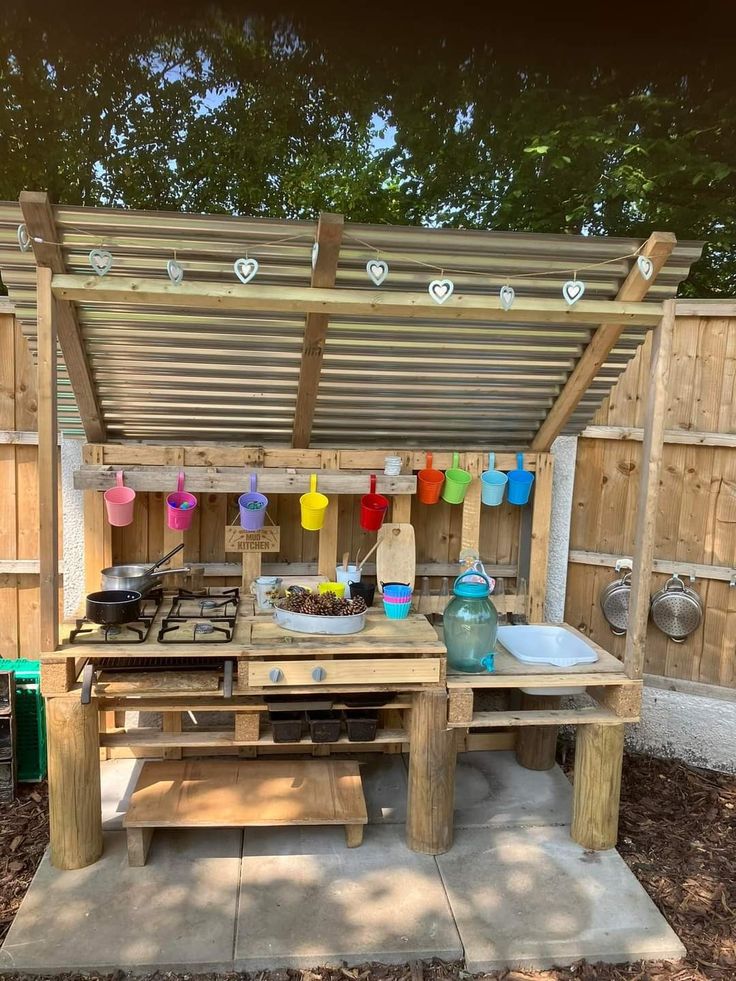
- A fence or wall nearby if you want a simple “backboard” for hooks and shelves
Grab your tools and supplies
You don’t need a full workshop. You need a short list and a little confidence (or stubbornness).
Here’s what I use for most mud kitchen ideas:
- Wood for the frame is a place to start. You can use pallet wood or old decking or even 2x4s.
- Exterior screws are a must. They are better than nails because they can hold everything together when kids are running around like crazy.
- A countertop board (thick plywood or a solid plank)
- Bins or a metal bowl for a “sink”
- Hooks for utensils
- Sandpaper (splinters ruin everyone’s vibe)
- Non-toxic exterior sealant if you want extra durability
Tools:
- Drill/driver
- Saw (hand saw works fine)
- Measuring tape
- Level (optional, but your brain loves it)
FYI, I keep a cheap magnet tray for screws because I drop them constantly. 🙂
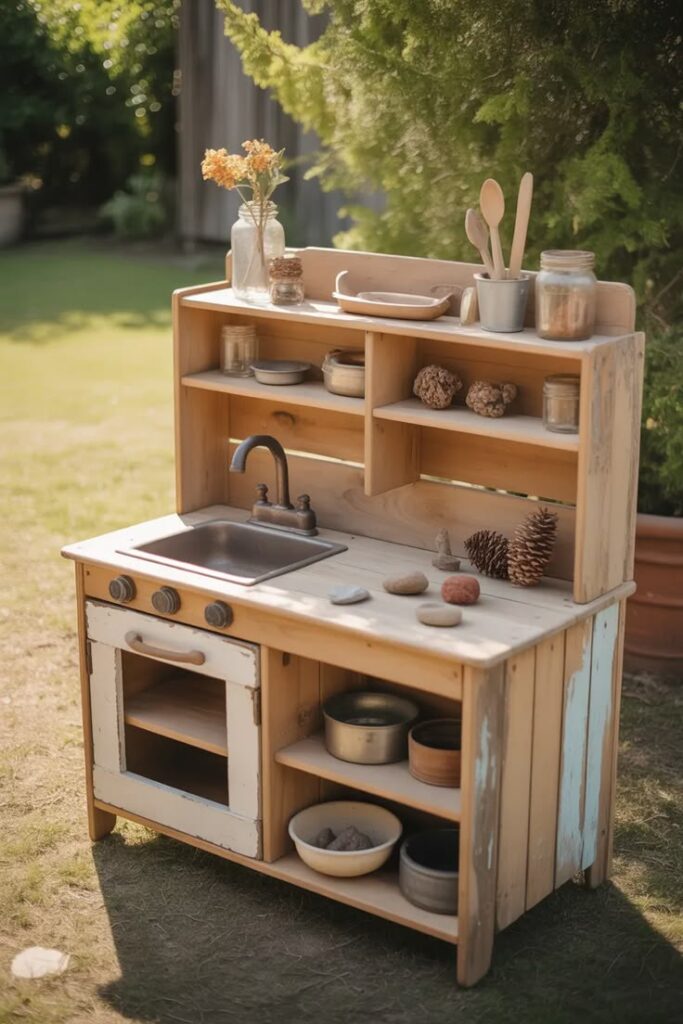
Decide: upcycled vs. new materials
You can build a mud kitchen from old furniture, or you can start fresh. Both work, so pick your stress level.
Upcycled build (faster, more charming):
- You repurpose an old nightstand or console
- You save money
- You accept quirky dimensions like a fun adult
New build (cleaner, more control):
- You choose the height and layout
- You get stronger joints
- You spend more, but you avoid mystery stains
Do you want “Pinterest perfect,” or do you want “kids actually play here”? I vote for play.
Step 2: Build the Base + Countertop (Sturdy Beats Pretty)
Build a simple frame in one hour-ish
You don’t need a complicated blueprint. You need a rectangle that refuses to wobble.
I build mine like this:
- Cut four legs to your preferred height (waist height for little kids works great)
- Attach front and back rails between the legs
- Attach side rails to complete the box frame
- Add a lower shelf frame if you want storage for buckets and pots
Keep things simple. Kids do not care about how thingsre put together but they will climb all over the place like little monkeys.
Add a countertop that survives “soup season”
Pick a thick Keep things simple. Kids do not care about how thingsre put together but they will climb all over the place like little monkeys. so it doesn’t sag when kids dump wet sand and rocks on it like they pay rent. I screw the countertop down from the top and pre-drill holes to avoid splitting. You can also add a small back lip so utensils don’t fall behind constantly.
For the countertop, I like:
- Exterior plywood (sealed) for budget builds
- A reclaimed deck board for a tougher surface
- A removable top if you want easy cleaning
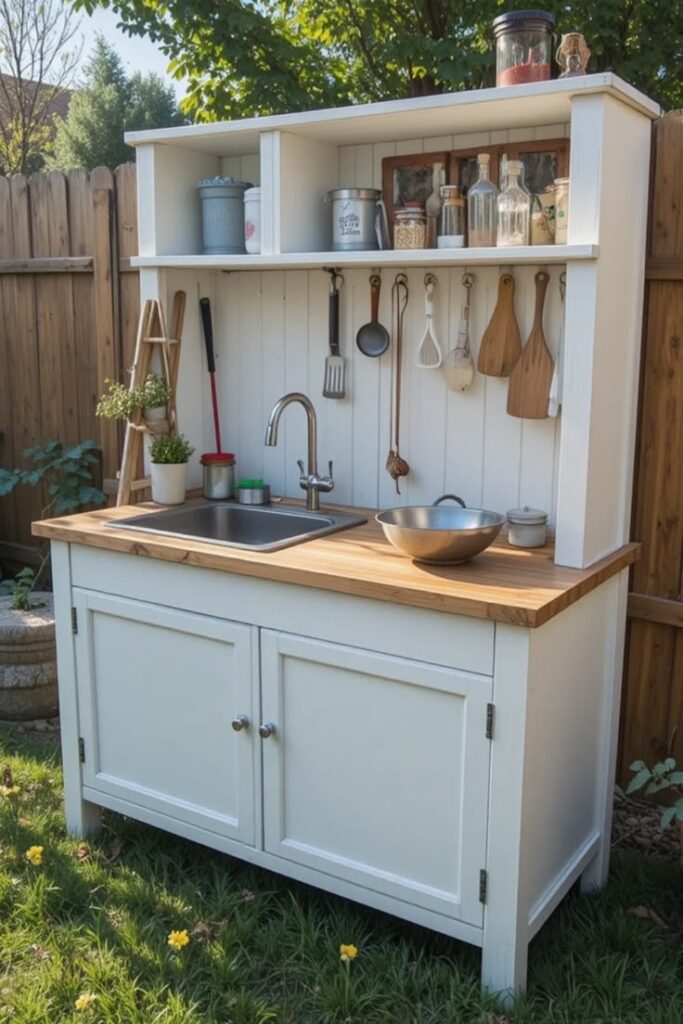
Make the “sink” without overthinking it
Kids love sinks. Kids also love pouring water until the universe runs out, so plan for that.
You can do any of these:
- Cut a hole and drop in a metal mixing bowl
- Screw down a plastic dishpan as a removable tub
- Skip the hole and just set a bin on top (yes, that counts)
IMO, the removable dishpan wins because you can dump it, rinse it, and move on with your day.
Step 3: Add Mud Kitchen Features Kids Actually Use
Set up the mud + water zones
A
Try this layout:
- Mixing station: big bowl or tub on the counter
- Ingredient zone: small buckets for leaves, rocks, pinecones
- Water access: hose nearby or a watering can on a hook
Do you want less mess on your main counter? Add a cheap rubber tray and call it your “mud mat.”
Add accessories (but don’t buy the entire internet)
You don’t need a shopping spree. You need a few tools that feel “real,” because kids love grown-up gear.
My go-to accessories:
- Measuring cups and spoons (plastic survives drops)
- Old pots and pans (dents add character, obviously)
- Wooden spoons (sand them smooth)
- Muffin tin for “cupcakes” and potion flights
- Chalkboard label for today’s “menu”
Want the magic trick? Hang stuff on hooks. Kids love grabbing tools off hooks like they run a tiny restaurant.
Set simple rules so you don’t lose your mind
I keep rules short, because kids don’t read policy documents.
I use these:
- No throwing mud
- Keep mud in the mud zone
- Wash hands after play
- Put tools back on hooks
Will they follow every rule every time? Of course not. Kids treat rules like suggestions written in invisible ink :/.
Extra Tips: Safety + Durability (Because Splinters Ruin the Mood)

Quick safety checklist
You don’t need to panic. You just need to finish strong.
- Sand every edge kids touch
- Screw heads sit flush so nobody scrapes a hand
- Stabilize the base so it doesn’t tip
- Skip toxic paints and use child-safe sealant if you seal anything
- Avoid glass, rusty metal, and sharp hooks
Do you want peace of mind? Add two L-brackets and anchor the kitchen to a fence or wall.
Make your outdoor mud kitchen last longer
Weather will try to destroy your project. You can fight back with small upgrades.
- Apply exterior sealant to the top surface
- Add a roof scrap or tarp cover if you leave it out year-round
- Use plastic bins for storage so wood shelves don’t rot
I also lift the legs on small pavers so they don’t sit in wet grass. That tiny tweak saves a lot of wood.
Mud Kitchen Ideas to Level It Up (Without Going Overboard)
Want to add personality fast? Pick one or two upgrades and stop there.
- “Oven” door with a simple hinge and a scrap board
- Spice rack with jars filled with sand, petals, and pebbles
- Rainwater station using a watering can and a funnel
- Recipe cards with silly menus like “Leaf Lasagna”
- Number labels for measuring and pretend baking
A great mud kitchen for kids needs a basic things.
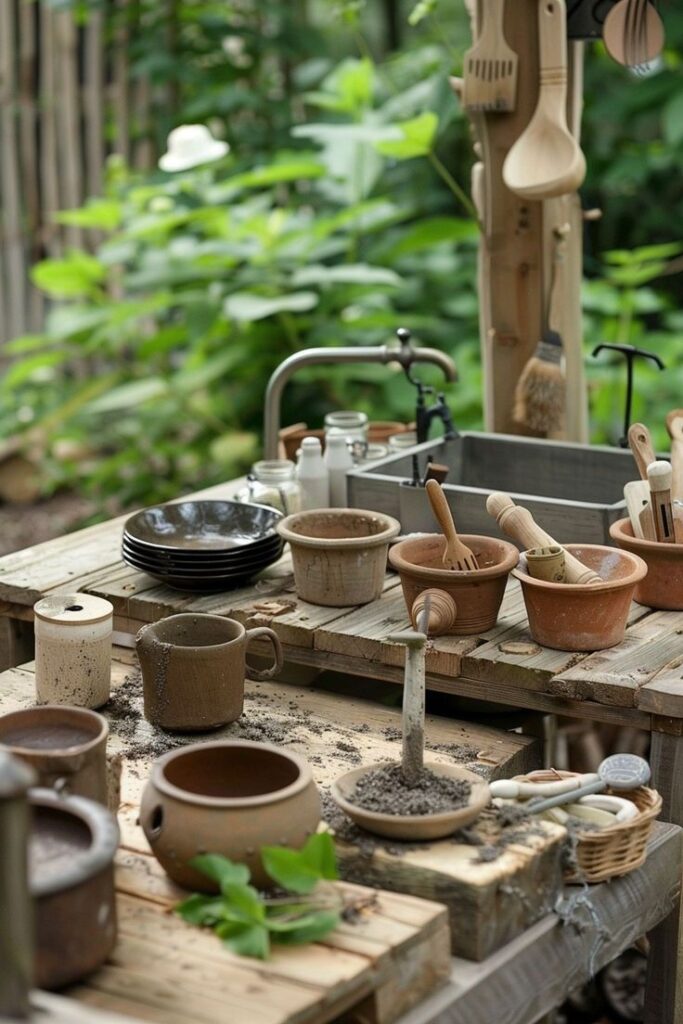
It needs a place for them to mix things and a place to store things. I put a bin of soil near the mud kitchen for kids and a bucket of water nearby. Kids are going to mix them anyway so it is easier to just make it easy for them.
If you want to make your mud kitchen for kids just pick one or two things to add and stop there. This way you can add some personality to the mud kitchen, for kids without making it too complicated.